The adventure of trying to make a house a home that we built for our family of six plus some craft, home décor, recipes & any family fun we might have.
Showing posts with label Décor. Show all posts

Thursday, 14 May 2015

Playroom Organisation.

If you saw my playroom at the moment you wouldn't call it organised but it's something I'm working on, it's a pity my children aren't working on it with me. So what am I going to tell you that you haven't already seen on Pinterest or other blogs. NOTHING. Today I just wanted to share with you what I'm planning on doing in our multi-functional playroom. What I've achieved since I started this project sixteen months ago and how I'm hoping to have it finished before school finishes in December of this year.

Our playroom needs to be multi-functional. At the moment it's nothing more than a dumping ground and an area that the children haven't used since we moved in two years ago. This room needs to work as a play area, homework area, reading area and a chill out zone for all the kids, especially if they want their friends over for a play. Sixteen months ago I had a desk installed to create a homework area that eventually they'll all use once everyone starts school and that's were it I stopped. This year with three children at school the desk isn't being used as it's filled with things from their bedrooms that I uncovered when I decluttered their bedrooms. I've needed to get in there and get the area organised otherwise the kids will be graduating and it'll still look terrible. We're half way through Term 2 and I'd like to have it up and running before Term 3 starts, otherwise it'll be another sixteen months and I'll have four children searching for places to do their homework.
Playroom Storage
The first thing I decided to work on was creating a storage system and a reading area that would work for our toys and an area for the kids to sit and read. Our playroom is a good size, making it idea for various areas within the zone. The storage system I set up was fairly easy to create, however if I was buying everything new it was have cost us $310.00 and for many families that could be too much money. I was lucky that I already owned two of the Ikea Billy bookcases from our previous house so there were only a few additional items I to buy (minus chalkboard paint) to create our toy storage area.
Playroom Organisation
Our curtains and rug have a heap of different colours in them, the kids love the rug's brightness so I decided to use some of the colours to help make the area fun, playful and timeless. I got rid of the toys that the kids no longer played with, those that were broken and any others that didn't fit within the criteria. I found some MDF coasters and fabric storage boxes at my local hardware store so that I could create labels for each cube.
Playroom Organisation
The labels were a simple process of drilling a hole into each coaster, painting each side of the coaster with my chalk paint. Each coaster got one coat of paint and this took a while as I had to wait for one side to dry completely so that I could paint the other side. Once the paint was completely dry (I let them cure for 2 days) I then used my chalk to write on each label. I then cut lengths of black sheer ribbon and narrow white ribbon and threaded them through the holes I'd drilled earlier. To attach each label to the storage box I just tired the ribbon around the handle a few times and then I tied a bow or knot depending on the ribbons colour.

So the entire make over of this area cost me $130 which wasn't too bad but if I wanted to reduce the cost a bit I could have used less boxes or waited for them to go on sale. I paid $5 for each box but later found out that when the hardware store has too much stock they go on sale for $3.60 each so I could have saved myself a bit of money. 

Overall, for a minimal amount of effort I'm really happy how things came together in this section of the room. The kids can now find toys they want and they we know which books are there for reading which saves Daddy from reading the same story every night. I'm now hoping that within the next 6 months I can find a chair for the kids to sit and read on, some art for the wall and a few cushions to make it comfortable when reading. 

Megan


Monday, 14 July 2014

Playroom Inspiration

We've lived in our not so new house for two years now and I'm presently looking to create a kid's area for the children to play in, create in and study in. With four children ranging in ages between nine and two it can be some what difficult to make the space work for everyone all the time. I knew straight up that I wanted the room to be multifunctional while also making it a fun and happy place to play in. So the first thing I did was search Pinterest to great some ideas of what makes a great playroom.

If you click on my Pinterest board you'll notice that colour, reading and homework area play a large roll when I've chosen the pins I've picked. In this post I thought I'd share my favourite playroom finds and the idea behind what I was thinking when I pinned each picture.

Love the colours and the amount of storage for toys.

Love the coloured canvas storage cubes and the little reading
nook between the bookcases.

A great bench seat that would be ideal for a reading nook.

Cushions for a reading nook to encourage
the kids to read.

Love the book cover letter to promote reading.

Long desk for all four children to sit at when
everyone is at school.

Love. Love. Love the colours in this room. It's so what I want for our
space because it would make you smile.

Love this rug and would love to great
something similar to it.
As you can see I have picked images that have a heap of storage within the room as well as lots of colour. If I had to describe my design criteria for the kids playroom I'd say that it might look like a 'Rainbow has thrown up in the room'. I'm wanting the colours to work within in the room without competing so I'm hoping that I'll e ale to pull this off when it all comes together.

In the coming weeks I'll share a few things that I've achieved so far within the room. I've got plans to paint a recently purchased bench seat using a new Australian made chalk paint that was released by a local business called Canterbury Blue Shabby Chic Furniture. The paint is called Chalk EZ2 Paint it's really easy to use and I'll go into more details when I get my seat finished.

I can't wait to share the things I've completed with you and I'm hoping that I get everything finished. I've now found the few things that I spent months searching for and I just need to find the time once school goes back to get this project FINISHED. Don't hold you're breath projects in this house seem to take forever to get completed. Wish me luck I'm sure I'll get there ha ha.

 Megan

Friday, 7 February 2014

Man Cave

Like most men my husband would love a space he could call his own and that's why I decided to turn our study into a man cave. For Christmas we put a shed up in the backyard, in order to free up some space in the garage. Now my husband isn't a shed type of guy so we needed an area in which he could hide away and do what ever men do in their caves. So with only one room left, the study will become his office when he works from home and thus it'll also be known as his man cave.

Like many couples if you present a space to them and asked them how they'd decorate it their responses would probably be quiet different. That's what it's like in our house. Mr Opoes likes a modern, minimalistic look with clean lines and I like wooden things, vintage items while also liking some modern pieces. I know you're thinking that we really don't have much to work with because we like different things but when we moved into our house we decided that we would like to decorate the house in a classic, vintage style with items that aren't cheaply made so that they will last us longer or so they'll last the children's treatment of them.

When we were building our house we designed the study to have two functions, one was to be a study and the other was to act as a guest room. After living here for nearly two years we've never had a guest sleep in the study. So when I was planning how I wanted the room to function I've made room for a blow up mattress to fit, still allowing the room to serve two purposes. This foresight meant we were able to add a built in wardrobe, thus allowing us to divide up the space between my husband's study and a guest room.

Last year I purchased a beautiful barn style door that I wanted to use as a table top for a desk and after explaining my concept to my husband he seemed pleased with the idea. Using the door will allow me to create a unique feature within the study as the door is  fifty years old so it'll be a vintage item with somewhat of a classic style. I'm looking forward to seeing what the door has to offer once it's stripped back and I'm hoping that we'll have a unique desk top for the room. The additional benefit is Mr Opoes will have a place to rest his laptop on while he works instead of sitting in the middle of the house, in the kids area.

Gallery Wall

Other decorating ideas include creating a gallery wall that you see when you come through the door. Directly opposite I'm creating a storage space so my husband doesn't have to leave the room to find a file while he's working. After talking to some of my blog friends on Facebook I also decided to hang three pictures above the storage space as they're sentiment to my husband and I, but I'll share those with you when the room is all finished. When I did the gallery wall in our front entrance my husband helped me hung all 33 picture frames and it was during this time that I learnt he liked the concept behind a gallery wall.

With this in mind I wanted to create something slightly different so that it would have more of a masculine feel about it. When I talked to my friend Mel over at Mellywood's Mansion she gave me the idea of creating a monochromatic gallery wall as she thought this would be something my husband would enjoy. This idea was perfect as I'd wanted to cover a corkboard within fabric, plus I had a few embroidery hoops that would be ideal for showcasing pieces of fabric to create the monochromatic look I was after. Not long after this Christian (another blogging friend) posted a picture on Facebook showing what Jamie from Raising up Rubies did with an embroidery hoop and I was hocked.


Now if I'd shown this picture to my husband he would have laughed but I had just the right shirt to go in my embroidery hoop and it would work perfectly with the monochromatic theme. The shirt I had in mind defines my husband so it was a no brainier that it would be perfect for my gallery wall. The other good thing was I could use the wooden hoops frames and this would save me having to paint them. After spending time ironing the shirt, sewing it down in places and hiding all the extra material in the back I was left with this.

Gallery Wall

I was really happy with the way it turned out and because of the size of the hoop I found it was easier to use cotton to hide the extra fabric instead of using glue to hide it away. I was really happy with they look that the various hoops created especially when I paired it with a few square canvas's, the rectangular corkboard and photo frame. When I presented the finished wall to Mr Opoes on his birthday he really liked it and ultimately that's all I was trying to achieve.

Gallery Wall

I am really happy with the look of this wall and I think that even though its monochromatic and masculine I really like it and I can't wait to get the entire room finished so that I can continue blogging in there when Mr Opoes isn't working from home. I'm hoping to find a way to use the kid's pet rocks in the room so maybe I'll find a space for them in the future. So what do you think I'd love to hear your thoughts on my little wall. Should I use the rocks on the wall? Tell me what you would do.

Megan

Monday, 3 February 2014

Rock Art falls for love.

Over the summer holidays I've been slowly working on doing up the study so that Mr Opoes has a quiet space to work in while he's working from home. Part of brief I set myself was to create a masculine, functional and usable space that we'd both comfortable using day or night. I also wanted to add some sentimental items into the room without over doing it. One idea I had was to create a functional gallery wall so that I could incorporate something personal on the wall without it been too obvious. I also wanted to have the option of changing out some art work so that I could change the feel in the the room whenever I felt like it.

As the room reveal will be somewhat of a surprise I tried to source all the items quickly and quietly so Mr Opoes didn't get any ideas about what I was doing. Before I'd even started collecting things to place on the wall I knew I wanted to use the kids pet rocks that they created last year, I liked that when you walked into the room you would't expect to see them hanging on the wall and they would also add a little bit of colour to the monochromatic gallery wall I'm doing.


So I got to work putting it together. I purchased a black shadow box from Ikea, I used some scrapbooking cardstock I already had, grabbed some craft glue and I purchased some stick on magnets. After positioning the kid's rocks in order from eldest to youngest I made the discovery that the piece of glass needed to be removed from the frame as Mackenna's rock was too high to sit behind the glass. Now this was the first problem I encounted BUT I continued on as I knew this was going to look great.


I just loved how they looked and admittedly I wasn't looking forward to dusting them all the time so I thought a quick spray of hair spray could help me out in the long run. I proceeded to stick and glue the magnet's into place on the back of the rock's so that they would eventually stick to the cardstock.


The next step involved placing the magnets to the back of the cardstock and to do this I had marked off where I'd need to place the magnets prior to sticking the rock to the front of the cardstock. This was where my second mistake took place as I only used one magnet on the back of the cardstock for each rock. I should have used a piece of tin, spray painted it white and then attached the magnets as this would have allowed them to stay magnetised.


Now I've got a picture. The first time I had an issue with the finished piece but I stopped taking photo's after that because my rocks just would stay attached to the cardstock or the magnets. In the end I attempted to complete the art piece a dozen times before I called it a day. The picture below looks innocent enough but I ended up having the rocks fall off the cardstock onto the floor time and time again. I only stopped when the cardstock ripped and I'd have to cut another piece.


So in the end I cleaned up all the mess I'd made with the magnets and glitter. I cut another piece of cardstock and I glued an MDF word onto the cardstock. This piece of art took me five minutes, didn't require a heap of planning or things and I must say it looks good. The only negative is that my children's pet rocks will have to go somewhere else. I've got a heap of area to decorate in this house so I'm sure that next time I'll purchase a piece of tin from the hardware store and I'll have them hanging on a wall sometime soon.


What do you think? Did I do the right thing or should I have used the rocks. I'll show you the finished wall later this week as I have to get a picture developed and will hang a few more things before the wall is finished but so far it's looking masculine and I'm loving it.

Megan

Tuesday, 5 November 2013

Simple way to add COLOUR

When we built our house last year we purposely kept the colour palette simple, this would allow us to insert our own personality into the house. I've spent hours looking on Pinterest, looking through decorating magazines and talking it over with Mr Opoes we decided that COLOUR was a great way to add style, fun and our personality into our home. We're happy we stuck with a simple palette, it will allow us to change the décor easily and inexpensively with a few additional items.

 
One feature that we've made permanent in the kitchen was the three orange pendant lights which I've talked about here and here. I knew at the beginning of the building process that I wanted pendant lights but I wanted something different from what all the shops were selling on mass. With each shop I visited the sales assistant would try to sell me a red pendant light and none of them were what I wanted. I'm glad I stuck to my guns as it would have made it very difficult to choose another colour to pair up with red. The other week I shared with you the pantry storage containers that I transformed to hold all my Tupperware. Each basket has a section of it sprayed hot pink and this is the colour that we've chose to use in our living room and kitchen.
 
So the other weekend I decided that I would add a small amount of colour to the kitchen area using the same pink colour that I'd used on the baskets. Sitting off to the side of my gas oven I have a small bamboo utensil holder and it looks pretty sad sitting there. So I used some painters tape and I taped off the area I wanted to colour block.  I gave it a spray of primer just in case the spray paint didn't cover the bamboo fully. When the undercoat was dry I then gave it a light spray of pink before following it up with another coat of the pink. I allowed these two coats to dry before deciding whether or not I needed to do another coat. I was happy with the two coats so I removed the painters tape and I added three felt feet to the bottom of the container as a little bit of paint had stuck to the bottom and I didn't want to have hot pink paint all over my Ceasarstone bench top.
 
 
I am really happy with how it turned out and I'm really happy that I took the time to do this little project as it's added a little bit of colour to the stove area without overpowering it. I've also added a small hand crafted wooden bowl in the same space to hold the keys and even though the woods are different they just seem to work well together. Now I have a few other ideas of how to add a bit more pink into the  space but I'll have to save for a while before I'm able to add anymore things to the space.
 
Megan

Wednesday, 2 October 2013

How to design a furniture layout that's perfect for any space.


Over the years I've learnt that it can be very costly and frustrating choosing furniture. You get it home only to discover that it's too big or small for the space that you're working within. Our previous house was a great starter home but with a growing family the room sizes were on the small size, thus making it easy to clutter up a room with the wrong pieces of furniture.

I learnt very quickly with our first home that it was important to get it right the first time because it could be a long and difficult process if you got it wrong. We had a neighbour across the street who's house was a mirror image of ours and when I visited her I'd always look at how she'd arranged her furniture so that I could try it out at our place. I remember that she never had a lounge suite in the front formal room which we were using as a living and craft room. It was all because she couldn't find the right lounge suite to fit into the long narrow space. It took her five attempts before she got something that worked but she never really loved how it looked in the space and I think that was because she just settled. It had become too tiring bringing lounges in and out of her house only to discover that they were so wrong in that space. With this in mind that's why I use my method when needing to purchase furniture for any room in our house.

I've been looking to purchase some new furniture for our dining room and living room ever since we moved into our house sixteen months ago. During this time I've been putting money aside, especially as I've wanted to purchase good quality items due to the short life of our previous items. There are a number of steps I use during the process to choose furniture for a particular room. I've found that they work really well for me and I hope they might help you next time you're looking to purchase furniture for a particular room. These are the steps I followed when I recently purchased our new lounge and dining table. You can also use this process when purchasing rugs or art.

1. When I'm interested in purchasing furniture I like to spend time looking at the furniture, sitting on it, touching it, watching how the children use it and generally making sure that it was something we'd need and use. I also make sure I get the measurements for each piece either from the store or online.

2. I take lots of photographs of each piece when I'm in store so that I can show them to Mr Opoes to get his thoughts and opinions. If the items are online I'll show them to Mr Opoes and again we'll talk. This process allows me to get a feel for what he wants and I'll even take him to the store so that he gets a feel for each piece and he can eliminate something because it's wrong for his frame, height etc.

3. When we get home I take out my painters tape and I start measuring up the space it'll occupy. This is particularly helpful if I'm purchasing a dining table, 2 seater lounge, 3 seater lounge, king single bed, single bed and the list goes on. The best part about taping out the size of the furniture is it stops you from making a big mistake when you're in the store. If you're interested in two different sized dining tables its best to tape them out with different coloured painters tape.


4. If other pieces of furniture need to move then move them to get a feel for how the pieces will work within the room. We're a family of six so originally I wanted to purchase two 3 seaters but with each measuring 2.52 metre (8 feet 3732 inches) long I just couldn't make it work within the space. During the process of placing the tape on the floor you can step back and see what will fit and what doesn't fit.


5. Then it's back to the furniture store or online to place your order. This whole process would have usually taken me two days to complete but with it being school holidays I had to work around the kid's activities and their pain threshold for furniture shopping. 

As you can see from my photographs I chose the one day that it was overcast and wet to take my money shots. It's a pity I didn't hear the weather forecast the night before as it would have helped with the photos I took. Now to delete the sixty photos I still want people to think I'm a professional photographer ha ha. Now we should receive our new furniture by the first week of November so I'm hoping that all this preparation pays off especially as the lounge is getting made in the fabric I chose.

When it arrives I'll share progress photos minus the overcast weather so you can see how the room looked before and after. I'd love to hear how you go about choosing furniture for rooms that you're decorating. Tomorrow I'm going to share with you how I'm thinking of organising my Tupperware and other plastics in my pantry as the children are stealing it and hiding playing with it.

Megan

Friday, 6 September 2013

Framing the Entry... the reveal


Drum roll please...... As promised yesterday I want to share with you my very first gallery wall and it definitely won't be my last. I've loved gallery walls since they become popular in the blogging world, so much so that while we were building our house I went out and purchased a heap of picture frames so that I could get started immediately after moving in. Well that was fourteen plus months ago and this wall wasn't even on my radar back then. So today as promised I'm going to show you the completed gallery wall but first I want to give you a break down of how I'm going on my to-do list and to give you some idea of what I've spent so far on my Entry makeover.
I thought that this project would have been done and dusted within three weeks maybe a bit longer if the electrician was booked up BUT I miss judged the amount of work involved and my ability to get it done. I'm still looking into the electrical work as pricing will play a major role work but I also need to think outside of this particular room so that I don't have to call them back later to do more electrical work as this will be expensive on the hip pocket. Maybe now that I've finished the gallery wall I can tick off some of the smaller tasks....
  • create a gallery wall
  • find a table, bench, stand for added storage
  • tint glass on door and side panel
  • repaint the hall table
  • add a pop of colour to the front door
  • change the large chandelier with something more practical for the space and the ceiling height
  • find something to go on the wall above the hall table
  • dress the hall table
  • maybe a rug or something for the floor
  • add vintage suitcases
Now for the budget. We set $800 for this project which may seem quite large but while we were building our house Mr Opoes and I decided that we'd include a beautiful feature light in the entry and with dreams like that a big price tag is sure to follow. During construction I fell in love with a heap of beautiful lights I liked but they all came from America and this could have meant that I'd be faced with issues relating to voltage (we have different requirements) and with the light meeting Australia's Safety Standards so I had to look else where. So here is the breakdown of what I've spent or need to spend:
  • picture frames $60
  • paint, primer and spray paint $70
  • 3M Command Strips $58
  • butchers paper $0
  • painters tape $0
  • black ink pen $0
  • paint chips $0
  • brand new light $375
  • electrician - could be up to $200
  • hall table plus new paint $119
  • window treatment $24.98
  • TOTAL: $906.98
As you can see I'm already over budget, it's possible that my guessimation is way under budget which means I'd need more funds to install the light. I've decided that I'll take the time to save the additional money needed so that we can have the light installed but in order to put some funds back into the kitty I'm going to try and sell the chandelier on-line. I'm hoping that if I price it correctly I should be able to sell it pretty quickly.

So without delaying the reveal any further I now have the pictures you've all been waiting for (sounds dramatic doesn't it). I hope that you like the colourful gallery wall that I've created as much as I do and I'm looking forward to completing the entire entry within the next month or so.


So tell me what you think? I'd love to hear what your opinion is of my gallery wall. I love it and the pop's of colour give the room some character which is exactly what I wanted to achieve when I started this project. I'm hoping in the next week or two to get the tint onto the glass panels on the door and on the panel beside the door. I'll have to organise with Mr Opoes to take the children out for a few hours so that I can spend the time doing the job correctly. Fingers crossed I get everything done within the time limit I've set myself.

Megan

Thursday, 5 September 2013

Framing the Entry Part 2


So last week I showed you some of the inspiration I'd collected on my Pinterest board as to how I'd like to decorate our entry. As you could see I wanted to create a colourful, empty gallery wall using six coloured frames to complement the silver/chrome light fixture and black hall table that will feature in the room. So I started collecting paint chips from my local hardware store so that I could figure out which colours complemented a beautiful orange paint that I'd found. I settled on purple, pink, yellow, silver and teal to go with my lovely bold orange. However, when Mr Opoes visited the hardware store to purchase 5 sample pots I needed Mackenna and Viveca picked up a few paint chips of their own and one of them caught my eye, so I swapped out the teal and replaced it with my new favourite colour.
 
1. Ballistic (Wattyl) 2.Perfect Purple (Wattyl)
3. Pale Daffodil (Dulux) 4.Perfectly Pink (Wattyl)
5.PlastiKote Metallic Pewter 4403  6. Silk Sari (Wattyl)
Now the next step I took was a little different from all the tutorials I'd read so without giving you a long winded description of what I did I thought I'd just show you in pictures. I've also attached a simple explanation so that you can understand what I'm trying to show you. Some pictures won't be that great because one of the kids took the photograph for me as I was busy and couldn't do two things at once.

Depending on the number of frames you're hanging I'd plan the layout before attaching
to the wall. I taped off the space I wanted to work within on the floor.
Next I lay butchers paper down on the tiled floor within the taped off area as this was the space I'd be working with once it was on the wall. Having the paper down gave me the opportunity to visualise how it would look up on the wall plus I also make any changes I might need. With a black felt pen I traced around the frame and then I removed each of the backing pieces from the frames.
 
1. Trace around the frame with black pen. 2. Remove the glass, paper and chipboard.3. Using pliers remove
the little metal pins that hold the picture in. Place back on the butchers paper.
In total I had thirty one photo frames and six paint colours which I had to group together without it looking too planned or busy. While talking to my sister she suggested that I gather up a heap of paint sample and throw them up into the air. I loved this idea and so I decided that wherever the paint chip landed would determine the frames colour. However, if more than one colour sample landed on the same frame I'd previously decided that the sample facing up would be the colour chosen. I also wrote each colour under each drawn frame.
1. Mr Opoes throwing paint chips in the air. 2. Paint chips on each frame.
1. I cut each paper frame out 2. Paper template taped to the wall.


Finally it was time to place all the frames up on the wall. I purchases a heap of 3M Picture Hanging Strips (Velcro type) in different width and sizes so that I could place each frame up on the wall. Mr Opoes helped me when it came to placement as I needed to know whether or not the frames were straight. Once everything was straight and in the correct position I then pressed each frame down for a minute. As I didn't follow the directions correctly I used strips that would hold more than the actual weight of the frame.
 
Now if you're still reading congratulates. I will share the pictures of our finished wall tomorrow as I am experiencing problems with my camera so I'm going to have to use my phone tomorrow to take more pictures. Tomorrow I'll also talk about what other things I need to complete in order to call this project FINISHED.

Have you ever started a project only to discover that it's taken longer to finish than what you anticipated? This project has taken me so long I gave it two weeks and I've already gone past that by an additional four weeks and counting.
 
Megan

Friday, 30 August 2013

Framing the Entry

I'm a lover of Pinterest and while I've been blogging I've enjoyed looking for DIY projects, recipes, clothing projects that I might get around to sewing and any things that might relate to decorating our house. Recently though I haven't gotten to pin too much as I've been concentrating on doing Amy's Growing Together: Summer 2013 course and making changes to the look of my blog. So it came as a huge surprise the other week when I realised that we moved into our new house just over twelve months ago and not much has changed.

My entry is still the same as it was the day we moved in (OK there is a lot more dirt and dust than there was on handover day). It's plain, boring and in need of so DIY loving. When you walk into our house it would be really hard for you to see how many hours I've spent dreaming about how I want to decorate the house (particularly the entry), planning how to decorate many of the rooms and collecting pin's for my Pinterest boards (when I have time) so that I could use any of the idea's later down the track. Well I'm pleased to say that I've finally taken the leap and I'm going to use a few of the pin's from my Entry board to create a warm and welcoming entry to our house.

It all started in May when I visited Jen's blog Tatertots & Jello and I discovered her Wall of Frames. I fell in love with it instantly, I pinned and then I showed it to my husband the moment he walked through the door after work. Let's be honest It was an ambush and my husband didn't know what had hit him. So I started collecting frames from around the house, I visited thrift stores and I purchased more few decorative frames from a dollar store, Target and Bed, Bath and Table.

I rang my sister later in the week and shared Jen's link with her to see what she thought about my idea especially because she helped design our house. While talking to her she suggested that we could use more than one colour which would add to the feature I wanted to create. So I jumped back on Pinterest and I started searching for gallery walls that used colour and when I found a few pin's that used a heap of colour I knew this was the direction I wanted to take.

Source can be found on my Pinterest Board.

So I got to work collecting frames, looking for paint chips that complement each other, dreaming of a new light fixture and looking for a hall table. In order to save money I started looking at thrift stores for wooden photo frames and I was able to find a few but each one looked the same so I had to spend a bit of money buying nice ornate frames. I also tried Gumtree to find my hall table and pendant light however all the ones I liked sold really quickly or they were priced out of my budget.

So you can imagine my delight when found a women on Facebook who sold used furniture. The best part she was only 20 minutes drive away and I had the option of buying the item as is or she could 'shabby chic' the piece in a colour that you wanted. I went to the store just to see what she had on offer and also hoping that I'd find something. When I went into the back room I saw a beautiful little mustard table but it had been given the shabby treatment and I didn't really want to spend the time and money changing the colour. That's when I remembered that my father had up-cycled a dressing table for my daughter last year so I thought that it was a possibility. I decided to leave it at the shop because it was more than I wanted to spend and I knew that I could get something cheaper on Gumtree.

A few weeks later I decided I'd go back to see if the table was still available or if there was any other pieces that might work in the entry. I found lots of chairs, bedside tables and other beautiful pieces but I couldn't find a hall table. Then I saw the mustard table again BUT this time it was within my price range so I went and had a good look at it. I bought it because I knew that it would be great in the space and secondly because I really liked it. So here is my little mustard beauty that I'm going to paint black and I'm going to change the colour of the hardware.

My little Mustard Hall Table.

I'm hoping that everything works out well with my first ever house project. Pop back next week and I'll share with you the colours I chose and the layout I decided on. I'll also share with you the method I used to select the colour combination that I used.

I'm in love with colour at the moment, which is really funny because I don't generally have a heap of colourful clothes in my wardrobe. Tell me do you only use two or three colours when you decorate or do you use a selection of colours that compliment each other.


Megan

Thursday, 31 January 2013

My first DIY project....

My beautiful barn style door that
 I'm working on.

So after the 6 weeks I've had away from blogging over the Christmas/school holiday's I'm back and I'm ready for what 2013 has to offer. It's hard to believe that January is almost over and we are inching closer and closer to the end of another year. There isn't much changing here this year. Caelan is in Year 3, Mackenna is off to pre Prep and my other two cherubs will be at home with mummy but we're looking into having Viveca attend day care one day a week so that she can further develop her social skills.
I had grand plans of doing a few projects during the holiday session however things don't always go the way you want them to so you just need to adjust and refocus your attention. This year I'm hoping that I'll be able to focus more of my attention on decorating this house, spending time with the children and thinking up new things to blog about. Now to blog I need things to share so I thought it was about time that I started working on a project that I've been wanting to do for about four months now.

Over the weekend I pulled out the old barn door that I got from a lovely lady who was advertising it on  Gumtree four months ago. I paid $30 for it and Mr Opoes doesn't know why I wanted an old door when we don't really need another one. The reason I purchased the door was because it was made from timber and it isn't hollow like the internal doors you can purchase from the local hardware store. I have plans of making something out of it BUT first I have to remove all the hardware and then there is 47 years of paint that also needs removing. Yeah.

So I thought I'd share some pictures with you so that you can see what I'm working with.

 
The first thing piece of hardware off
was really easy.

Part 2 these need removing because they are SHARP

Simple slot screw to remove.

Had to use paint stripper due to the amount of paint.

FINALLY I removed the screw and by this stage
it was too late to do anything else.

In the interest of keeping it real it took me nearly two hours to remove the seven phillips screws from the bottom of the door. Next I tried to remove the slotted screws but I experienced a heap of problems so I made a trip to the local hardware shop to buy a couple of items to remove the eight slotted screws from the metal hinge plate. Back at home I removed two of them, sprayed the other screws with CRC and left it overnight. Unfortunately the CRC didn't help and I wasn't able to loosen any of the other six screws. I then applied my Orange paint stripper, left it 20 minutes and the removed most of the paint from around the screws. My next plan is to spray WD-40 and try adding a little heat from my blow dryer to see if this will help with the removal process. I know that I have a bit of a rust issue to work with and then there is also the issue of the paint. I'm also going to try to strip some more of the paint from off the metal hinges.

I'll give you more of an update as I progress on this project especially as its not going to be as easy as I'd hoped. I'm hoping to get this all finished within the next few months so that I can surprise Mr Opoes with my DIY skills. I had hoped to have finished it in time for Valentines Day but it looks like it'll take me quiet some time to complete the job successfully.

Megan

Monday, 19 November 2012

De-Cluttering, Young House Love, Sickness and Another Failed Project.

Well I've been away for two weeks and I've really missed you guys. We've had a few things going on during these two weeks so I thought I'd share with you what we've been doing. I spent an entire week DE-CLUTTERING sections of our house so that I could create more room in our house. One thing I discovered during this time was that I have held onto so many things that I've wanted to use later but I don't think I'll ever find the time to get around to doing every project I've thought of. I set myself a goal for the week, I wanted to get the car into the garage so that we'd be protected when it rained. I didn't achieve my goal but I did get rid of quite a bit of stuff, I was able to set up a store area for school bags etc and I got Mackenna's bedroom furniture into her room. However, I still have a heap of things to get rid of and with the wild weather we've experienced in the last two days I really need to pull my finger out.
 
 
My book 'Young House Love: 243 ways to paint, craft, update and show your home some love' by Sherry and John Petersik arrived on Wednesday at my doorstep. I was so excited that I sat right down to have a quick read. The first project was something that I'd been thinking about for ages so I was really excited to get my remaining supplies so that I could finish off the project. I found wrapping paper that fitted with what I wanted and I also grabbed some more double sided tape so that I could stick everything down. Well after spending 6 hours trying to stick wrapping paper directly to the back of a billy bookcase I gave up. I was so frustrated that I ripped the wrapping paper off and this lead to removing some of the colour of the backing board. So now I'm going to try following John and Sherry's advice and I'll stick the wrapping paper to bits of cardboard or foam core. I was going to share picture BUT when the project doesn't work I'm going to keep it secret until I finally get this little project off the ground.
 
Now we have all been ill with the flu around hear and as usual I'm the last one to catch it. A mother's life is so exciting especially when you know that 5 other sick people will eventually make you sick. I will be returning later in the week due to the fact that I'm going through the worst of this dreaded flu and this phase lasts a few days. When I return I will share with you the Christmas ornament I made as part of the Christmas Ornament Exchange program I've signed up for.
 
 
So I am off to look after the kids while also trying not to spread my germs around again. Thanks for stopping by and I can't wait to show you what I've been up to while I've been sick.
 
 
Megan

Monday, 25 June 2012

Thirty Finds

Mr Opoes told me about a school fete that was happening nearby so we piled everyone in the car and off we went. The school had blocked off many of the streets surrounding it, this was a great idea as the number of people attending the fete was quiet large. Having a pram really limited access to all area’s which was a little off putting but what can you do? I really wanted to go up to the second floor because they were selling a heap of art and I’ve been thinking of buying a small piece for the new house. Didn’t make it up there as the kid’s weren’t happy and I wasn’t going to carry a pram up two flights of stairs.

I found out that there was a second hand clothing stall and I wanted to go see if I could get an avocado green t-shirt so that I could re-purpose it. So off we went down about 10 stairs, the kids entertained themselves looking at books while I trawled the clothes. I didn’t find anything that resembled an avocado so I moved on over to the books. The kids were quiet in grossed in the books so I moved on over to the trash and treasure section to have a quick look around.

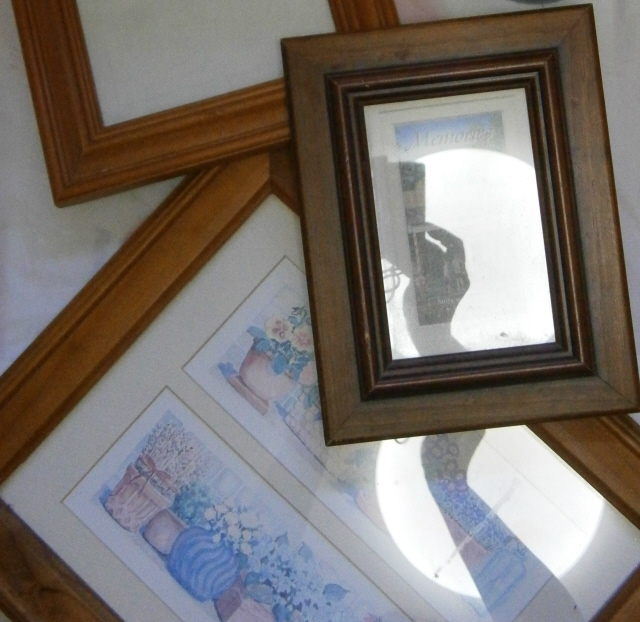
This was what I found. I got these three wooden photo frames for $1.50 and $0.50 cents. I’m going to spray paint them both and then use them to create a gallery wall so you should see some of it from the front door or I’ll add them to the hallway that leads to the kids bedrooms.

The other item I purchased was this blue lamp base and it even came up with a light globe. I paid $3.00 for it and it’ll be the perfect lamp for Mackenna. I’m going to spray it a glossy white and then add a dark purple shade so that she can put it on her bedside table. Mackenna wants a purple bedroom but I don’t want to run the risk of her not liking the chosen colour. I’m going to add the purple using accessories so I’m hoping it works.

So what do you think? I’m happy with myself because I’ve never found anything that I’ve needed before, I’m hoping that there re-purposing is a success.

 
 Megan